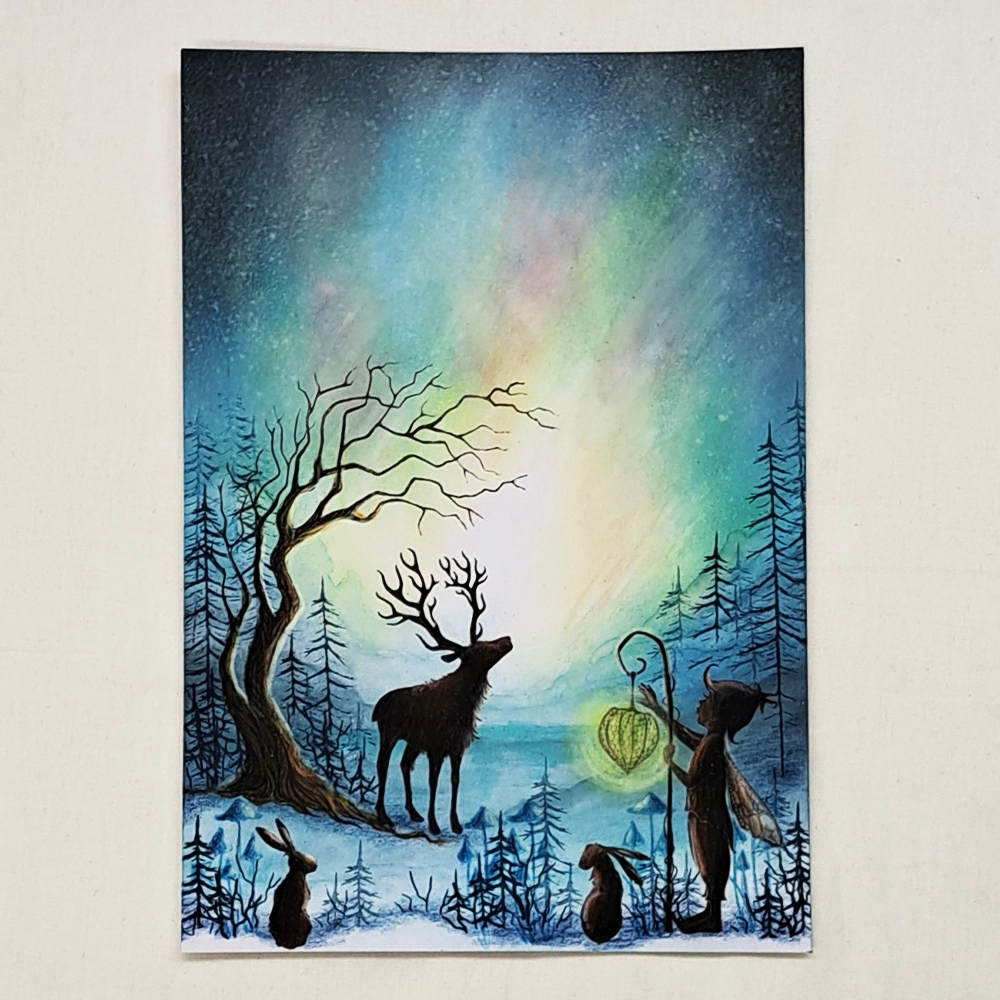
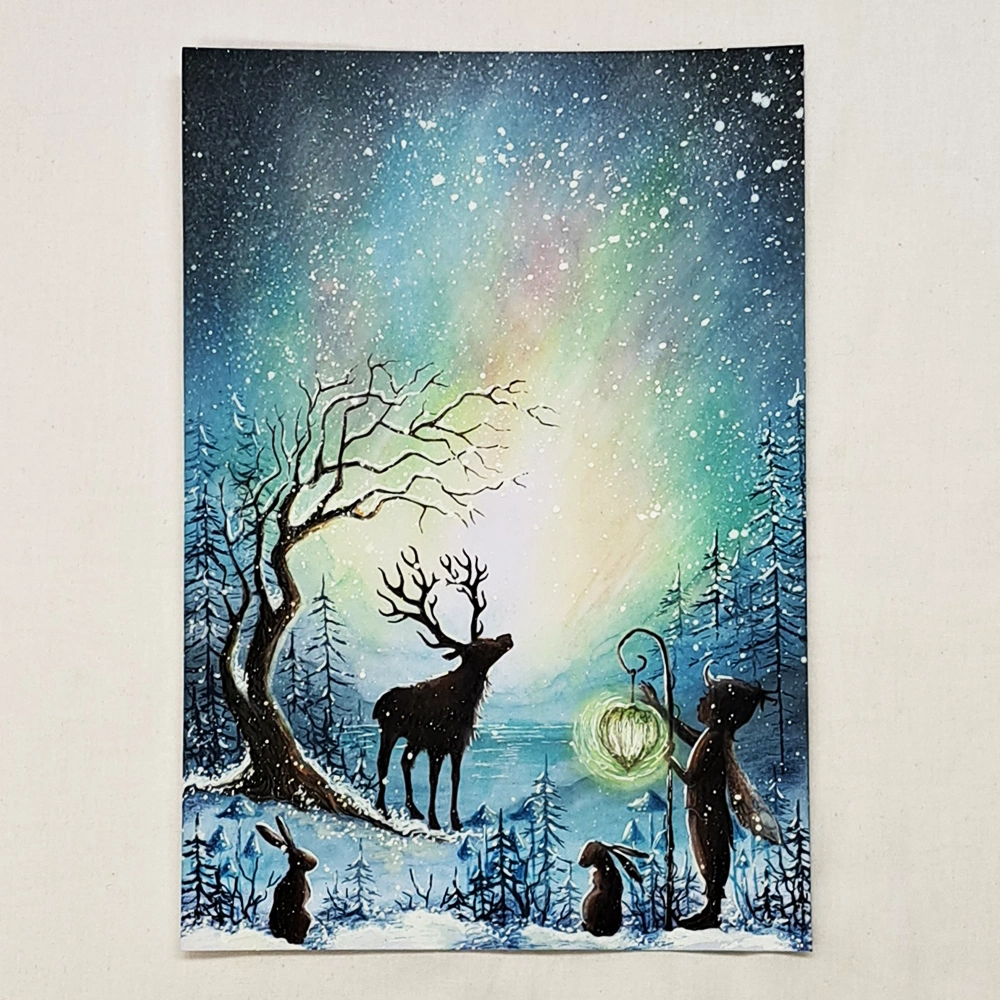


 Tree of Courage Stamp
£10.80
Add to cart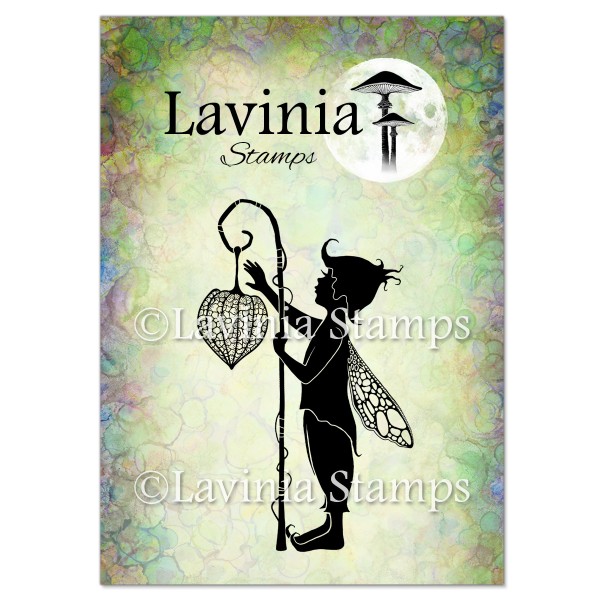 Fip Stamp
£7.20
Add to cart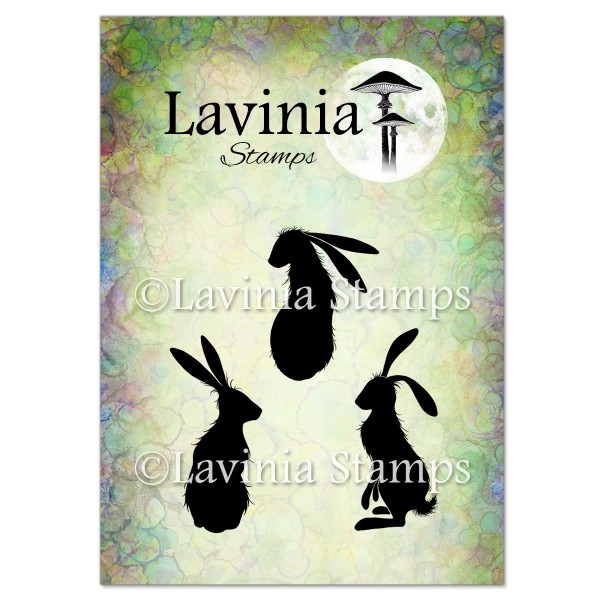 Wild Hares Set (Small) Stamp
£6.80
Add to cart Reindeer (Small) Stamp
£6.80
Add to cart Red Pine (Small) Stamp
£6.30
Add to cart Foliage Set Stamp
£5.80
Add to cart Slender Mushrooms Mini Stamp
£1.10
Add to cart Elements Premium Dye Ink – Blue Atoll
£5.85
Add to cart Distress Oxide Ink Pad – Tumbled Glass
£6.25
Add to cart Elements Premium Dye Ink – Dark Denim
£5.85
Add to cart Elements Premium Dye Ink – Graphite
£5.85
Add to cart Distress Oxide Ink Pad – Picked Raspberry
£6.25
Add to cart Brilliance Moonlight White
£6.85
Add to cart Versafine Clair Ink Pad – Fallen Leaves
£5.80
Add to cart Versafine Clair Ink Pad – Twilight
£5.80
Add to cart Versafine Clair Ink Pad – Warm Breeze
£5.80
Add to cart Versafine Clair Ink Pad – Bali Blue
£5.80
Add to cart Multifarious Card – A5 White
£5.80
Add to cart Spray Bottle
£2.50
Add to cart PanPastels – Hansa Yellow
£9.30
Add to cart Lavinia Stencil Brush (Series 3)
£3.50
Add to cart Mondeluz Watercolour Pencils 72 Set
£59.95
Add to cart Uni-Ball Gel Pens
£1.90
Select options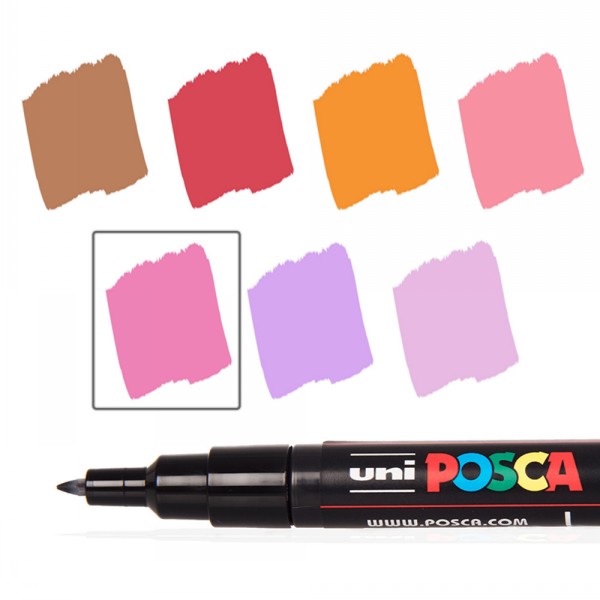 Posca Fine Tip Pens Autumn Collection
£3.15
Select options